The charger is the cheap part. The distance between your electrical panel and the garage is what this project costs, and it varies by a factor of ten depending on what is already buried in your yard. So before you choose a charger, find out which of three situations you are in — because that decides the amperage, and the amperage decides the charger.
Find out what is already out there. Nothing else matters yet.
Walk into the garage and look for a small panel or a disconnect on the wall. Then find the breaker in the house panel that feeds the garage and read it. You are looking for one number: the amperage of the existing feed.
Three outcomes, in descending order of luck:
- A subpanel of 60 amps or more.You have won. The garage can take a proper Level 2 charger on its own dedicated circuit, and the job is now an ordinary garage install — see charging an EV in a garage.
- A small feed — one 15- or 20-amp circuit, or a 30- or 40-amp subpanel. This is the most common case in older houses, and it is where the interesting decisions are. Keep reading.
- Nothing, or an extension cord someone ran in 1994. You need a new feed, which means a trench, which means this is a real project. Also keep reading.
One thing to do before anything else: call 811 (or your local equivalent) and have utilities located, even if you are only thinking about it. You need to know where the gas, water, sewer and telecoms lines run before anyone prices a trench, and it is free.
Route 1: size the charger to the feed you already have
This is the route most people should take seriously and most skip, because it feels like a compromise. It usually is not.
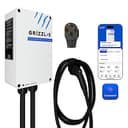
Chargers are sized by circuit: a continuous load is sized at 125% of its draw, so a 48-amp charger wants 60 A, a 40-amp charger wants 50 A, a 32-amp charger wants 40 A and a 16-amp charger wants 20 A. Most Level 2 chargers can also be dialled downat install — the Grizzl-E at pick one publishes “adjustable current 40A - 16A”, for instance — so one charger can suit several feeds.
Now the arithmetic that makes this route attractive. A 32-amp charger delivers 7.7 kW. Over an eight-hour overnight window that is about 61 kWh, which on almost any EV is well over 200 miles of range added in one night. If you drive 40 miles a day, a 32-amp charger on an existing 40-amp feed charges you from empty to full overnight with hours to spare — and it costs you nothing but the charger. Our 32-amp roundup covers that tier, and how long charging takes does the maths for your own battery.
Two caveats. The existing feed has to be adequate and sound— correct conductor size for the distance, in good condition, properly terminated — which is an electrician’s judgement, not a visual one. And the charger wants a dedicated circuit: sharing a 40-amp subpanel with a workshop compressor is how you trip breakers at 2 a.m.
Route 2: load management instead of a bigger feed
If the garage feed is modest but you want more than it nominally supports, load management is the middle path. A charger with load management watches household or feeder load and reduces its own current to stay inside the limit, so it charges fast when nothing else is running and throttles when something is.
Emporia’s PowerSmart bundles the panel monitor it depends on; Wallbox does it with Power Boost; Autel publishes Adaptive Load Management and Dynamic Load Balancing, though it does not publish what sensor hardware ALM needs, which is a real gap when you are planning an install. Our load management guide covers the mechanisms, and Emporia vs Wallbox compares the two most common implementations head to head.
Be clear-eyed about one thing: load management protects a feed from being overloaded. It does not make an undersized or damaged feed safe, and it does not help if the garage subpanel itself is the problem rather than the house service.
Route 3: a new feed, and why you should put in a subpanel
If there is no usable feed, you are running one. The work, roughly in order: locate utilities, dig a trench to the required depth for the wiring method used, lay conduit, pull conductors sized for both ampacity andvoltage drop over the measured distance, land it in a subpanel in the garage, then run the charger circuit from there. Permits and inspection where your jurisdiction requires them — which is most of them.
The trench is almost always the biggest line item, and it is the one that varies most: forty feet of lawn is a different proposition from eighty feet under a driveway you will have to cut and re-pour. Which leads to the single most useful piece of advice on this page:
If you are opening a trench, size the feeder for a subpanel, not for one circuit. Once the excavation is paid for, the incremental cost of heavier conductors and a small panel is modest — and you get the charger plus lights, receptacles, a freezer and whatever else the garage needs for the next twenty years. Running a single 50-amp circuit down a trench you have already dug is the decision people call an electrician back about.
Why the wire is heavier than you expect
Voltage drop rises with distance and with current, and EV charging is a sustained high-current load — the worst case for it. A conductor sized purely for the amperage can arrive at a distant garage with measurably less voltage than it left with, which shows up as slower charging and warm terminations. This is why there is no useful answer to “what gauge wire do I need?” until somebody has measured your run. Expect the conductor your electrician specifies for a hundred-foot run to be heavier than the one the same breaker would get in the house, and do not let anyone talk you down from it.
Route 4, the honest one: a 120-volt cordset while you decide
If the garage has a working 120-volt receptacle, you can charge tonight for the price of a cordset. The U.S. Department of Energy is straightforward about this: many EV owners meet their daily driving needs on Level 1 alone, with no additional cost or installation, provided there is an outlet on a dedicated branch circuit near where they park.
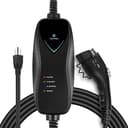
At roughly 3–5 miles of range per hour, an overnight charge adds something like 30–60 miles. If that covers your commute, you have just discovered that your expensive trench is optional. If it does not, you have learned exactly how much more you need before you commit. Pick three is the cordset for this; our Level 1 roundup covers the category.
The one rule: a dedicated branch circuit, and no extension cord. Charging for hours on a shared garage circuit with a freezer and a compressor on it is a nuisance; doing it through a cord reel is a hazard. Our extension cord guide explains why this is a heat problem rather than a voltage one.
Hardware choices specific to a detached garage
- Buy the outdoor enclosure rating even though it is indoors.A detached garage is usually unheated and often less sealed than the house. NEMA Type 4 or 4X in cast metal survives freeze-thaw cycling better than plastic, and it means you can move the unit to the outside wall later. See best outdoor chargers and best for cold weather.
- Do not rely on Wi-Fi reaching the garage.This is the single most common disappointment in detached-garage installs: the charger is at the far edge of the house network and scheduled sessions silently fail to start. Either prefer a charger that charges with no network once configured, or schedule in the car — the argument in best chargers without Wi-Fi.
- Hardwire if the choice is yours. One fewer outdoor-ish receptacle, and no NEC 625.54 GFCI-on-the-receptacle interaction to argue with. See plug-in vs hardwired.
- Buy cable length. Detached garages tend to be tight, awkwardly shaped and entered from one end, so the charge port is often further from the wall than you planned. Long-cable roundup.
- Verify certification by model number.EPA warns that not all chargers on sale are safety certified and that some listings display false certifications. A charger in an unattended outbuilding is the last place to take that risk — ENERGY STAR certified chargers.
Questions to put to the electrician
- What is the existing feed to the garage, and what can it safely carry continuously?
- What charger output does that support at 125% sizing — and can the charger be set to it?
- If a new feed is needed: what is the measured run length, what conductor size does voltage drop call for over it, and what does the trench cost as its own line item?
- What does a subpanel add over a single circuit, given the trench is already open?
- Are permits and inspection included, and who pulls them?
That last one matters. Our installation cost guide covers permits and inspection in detail, and how to install a home charger covers the sequence of work.
The short answer
Read the existing feed first, then buy the charger that fits it. A 32-amp charger on a feed you already have will add more than 200 miles overnight and cost you nothing but the hardware — which beats a 48-amp charger waiting on a trench. If you do dig, dig once and put a subpanel at the end of it. And if there is a 120-volt outlet out there already, plug in tonight and find out how much charging you actually need before you spend anything.